
20 Apr 2017
First look: Ubiquiti UniFi Access Point T-Rail Mount for Wi-Fi Stand & Drop Ceilings!
Working in the wireless industry, producing products for the industry, and having friends in the industry has its cool times. Like when product manufacturers reach out to you and ask if you can check out a new product. Whether it's a new AP or a simple mount, it's always awesome to open a box few have had access to. I recently got this opportunity with Ubiquiti Networks when they reached out to me to check out their new T-Rail mount and see if it would work with Wi-Fi Stand.

First off, thanks guys!
Thanks for taking the time to check with industry before rolling out a product to make sure it can be as accessible to everyone as possible. From the first Power Station I received a number of years ago to this, Ubiquiti has always had a great group of people internally that promote making products people will use.
The AP we'll be using is the Ubiquiti UniFi AC HD. This is a dual-band 802.11ac Wave 2 AP capable of 1733Mbps to the client.

It's larger that the Lite, LR and Pro models, so if it works on the Wi-Fi Stand, those products should too! I didn't have one of these devices so Ubiquiti provided one of these as well, which was totally cool of them.
The mount did not ship with the AP and I'm not sure if the plans are to ship it together or as a separate item. Either way, a few days later a box showed up with the mount kit in it.

It was pretty straight forward and simple. The type of installation you will be using has letters that correspond to the holes to use for the mount type. There were no instructions, but usually pre-release stuff like this is pretty basic. Not a big deal, and definitely not too hard to figure out.

We are using the "B - T-Bar Mount " option on this for drop ceilings and Wi-Fi Stand.

As always, the Ubiquiti packaging is on point. Kudos to always making each piece of equipment look like you paid way more for it than you did. Its one of the great psychological things that Ubiquiti continues to lead with.

The bracket that ships with the AP is made of plastic and ships with the AP. This is the one that requires you to makes some holes in the drop ceiling panel. I've always thought it was a clean design, but a little destructive. Glad to see this new mount but I will say I hope to see it in plastic soon. The metal on the mount is a little sharp and doesn't have the same "click" to it that the existing one does. Not a show stopper at all, just an opinion.

The mounting hardware the new kit shipped with has 4 screws and anchors, the T-Rail adapters, screws to hold them on, and some tools for the kit.

The T-Rail mounts have tiny, threaded, 6-sided screws on them to secure the adapter to the T-Rail as well as rubber stoppers to provide a non-slip fit. Both are cool little additions that probably don't add much cost but add a comfort level to mounting; your AP isn't going anywhere.
Installation
Installation is pretty straight-forward.
Mount the first T-Rail adapter onto the T-Rail and rotate it clockwise until they stop, sliding the rail in between the empty space on the adapters. The rubber stoppers should hold and secure the adapter.

Next, tighten the screws using the provided wrench to secure the adapter. Repeat this for the next one and place the second adapter on the rail a few inches away so that the screw holes for "B" line up.

Use the provided screws to secure the mount kit to the T-Rail adapters.

Align the wire entry area of the bracket to the AP and twist the AP onto the bracket plate. This is the part where there isn't a "click" like the plastic version to let you know it's secured.

That's it! You're mounted to a T-Rail with a Ubiquiti AP now!
Does it work with Wi-Fi Stand?
It sure does! Follow the same instructions as you would to a T-Rail on a ceiling.
Mount the T-Rail adapters.

Secure the mounting bracket plate.

Mount the AP to the bracket plate!
Now, using the Wi-Fi Stand, set up your temporary access!

Thanks to Ubiquiti for providing the early release of their new T-Rail mount for the UniFi AC HD Access Point, and event letting me "hang on" to the AP!
Shameless plug for Wi-Fi Stand Bracket and the new Wi-Fi Stand Rail!
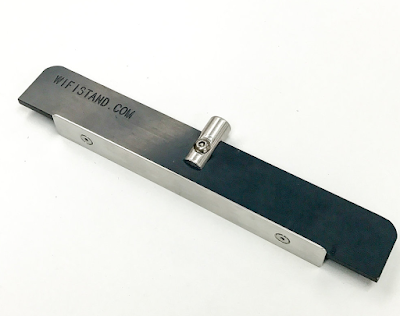
We use the same component on both, so if it works on the bracket it works on the stand!
Please visit www.wifistand.com to purchase either or both!
Keep reading
Related from the archive
The Ventev Rail Mount for the Aruba 500 Series #WiFi6 Access Point
via IFTTT
Using Dialpad with a Ubiquiti UniFi Phone for VoIP Over Wi-Fi!
At CTIA Super Mobility 2015 , I met a great group of people in the Startup City area called Switch . A longtim
Hands-On With the Cambium Networks Outdoor e700 Access Point
Nestled in the heart of McAllen, Texas along old US highway 83 is a food truck park that houses delicacies fro
Enjoyed this? There's a whole show.
I break down the wireless industry every week on Waves with Wireless Nerd.